Description
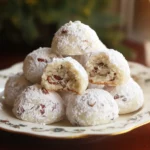
These Traditional Hot Cross Buns are the quintessential Easter treat! Soft, subtly spiced, and studded with currants or raisins, these buns are marked with a signature cross and finished with a delicate glaze. Baked to a golden-brown perfection, each bite is a delightful blend of comforting flavors and textures. This recipe captures the classic taste and aroma that fills homes during the spring season, making them a must-bake for Easter and beyond.
Why you will love this recipe
You’ll fall in love with this Hot Cross Buns recipe because it delivers that authentic, homemade taste that store-bought versions simply can’t match. The soft, pillowy texture of the buns, combined with the warm spices and sweet dried fruit, creates an irresistible treat. The process of making them is incredibly rewarding. Not only will your house be filled with the most amazing aroma, but you’ll also have the satisfaction of creating something truly special for your family and friends. Plus, the recipe is surprisingly straightforward, even for beginner bakers. Whether you’re continuing a family tradition or starting a new one, these Hot Cross Buns will be a cherished addition to your baking repertoire. They are perfect for breakfast, brunch, or as an afternoon snack, and pair wonderfully with a cup of tea or coffee.
Ingredients:
- 1 cup (236 ml) milk, warmed to 100–110 °F (38-43°C)
- 2 teaspoons instant dried yeast
- 4 tablespoons sugar
- 4 cups + 2 tablespoons (525 grams) all-purpose flour
- 1 teaspoon salt
- 1 teaspoon ground cinnamon
- 1 teaspoon allspice
- ¼ teaspoon ground ginger
- 1 cup (150 grams) dried currants or raisins
- 6 tablespoons unsalted butter, melted
- 2 large eggs, beaten, room temperature
To make the cross:
- ⅓ cup (46 grams) all-purpose flour
- 2 tablespoons sugar
- Hot water
For the glaze:
- 2 tablespoons powdered sugar
- Hot water
Preparation:
Step 1: Activating the Yeast: In a large measuring cup or small bowl, combine the warmed milk, instant dried yeast, and 4 tablespoons of sugar. Stir gently to dissolve. Let the mixture sit for 3-5 minutes, or until you see bubbles forming on the surface. This indicates that the yeast is active and ready to use. It’s crucial that the milk is not too hot, as this can kill the yeast. A temperature between 100-110°F (38-43°C) is ideal.
Step 2: Combining Dry and Wet Ingredients: In a large mixing bowl, whisk together the flour, salt, cinnamon, allspice, and ground ginger. Add the dried currants or raisins, ensuring they are evenly distributed. This ensures that every bun has a delicious burst of fruitiness. Create a well in the center of the dry ingredients. Pour in the milk and yeast mixture, melted butter, and beaten eggs. Using a spatula, begin to mix the ingredients together until a shaggy dough forms. Then, use your hands to bring the dough together into a large ball. Don’t worry if the dough is sticky at this stage; that’s normal.
Step 3: Kneading the Dough: Turn the dough out onto a lightly floured surface. Knead the dough for about 5 minutes until it becomes smooth and elastic. Kneading is essential for developing the gluten in the flour, which gives the buns their characteristic soft and chewy texture. If the dough is too sticky, add a tablespoon of flour at a time, but be careful not to add too much, as this can make the buns tough. Form the kneaded dough into a ball and place it in a lightly oiled bowl, turning to coat. Cover the bowl with a clean kitchen towel or plastic wrap and place it in a warm place to rise. The oven, turned off, is an excellent place for this. Allow the dough to rise for about 45 minutes, or until it has doubled in size.
Step 4: Shaping the Buns: Once the dough has risen, gently turn it out onto a floured surface. Knead it lightly for a minute or two to deflate it and redistribute the air. Divide the dough into 12 equal portions. Shape each portion into a smooth, round bun. Place the buns close together on a baking sheet lined with parchment paper. This will help them rise evenly and prevent them from sticking. Cover the buns loosely with a towel and let them rise in a warm place for another 30 minutes, or until they have doubled in size again.
Step 5: Preparing the Crosses: While the buns are rising for the second time, prepare the paste for the crosses. In a small bowl, mix together the flour and sugar for the crosses. Add hot water, a tablespoon at a time, until you create a thick, smooth paste. Transfer the paste to a zip-top bag or piping bag. If using a zip-top bag, remove the air and seal it tightly. Snip off a small corner of the bag.
Step 6: Piping the Crosses and Baking: Preheat the oven to 400°F /200°C. Once the buns have doubled in size, use the bag with the cross paste to pipe a cross on top of each bun. Squeeze gently and evenly to create clean, straight lines. Bake the buns for 15-20 minutes, or until they are golden brown. The baking time may vary depending on your oven, so keep a close eye on them.
Step 7: Making the Glaze: While the buns are baking, prepare the glaze. In a small bowl, whisk together the powdered sugar and 1 tablespoon of warm water until you have a smooth, syrupy glaze. Add a little more water if needed to achieve the desired consistency.
Step 8: Glazing the Buns: Once the buns are out of the oven and still warm, brush them generously with the glaze. The glaze will add a touch of sweetness and a beautiful sheen to the buns.
Step 9: Cooling and Storing: Transfer the glazed buns to a wire rack to cool completely. This prevents them from getting soggy. Store the cooled buns in an airtight container at room temperature for up to 4 days. If the buns start to firm up, microwave them individually for about 20 seconds to soften them.
COOKING Rating:
Easy to Medium. While there are several steps involved, each step is relatively straightforward. The most important aspects are ensuring the yeast is active, kneading the dough properly, and allowing sufficient time for the dough to rise.
Serving Suggestions:
- Warm with Butter: Serve the hot cross buns warm with a generous spread of butter.
- Toasted with Jam: Toast the buns lightly and spread with your favorite jam or marmalade.
- Cream Cheese Spread: A dollop of cream cheese or a cream cheese-based spread adds a tangy contrast to the sweetness of the buns.
- Alongside Tea or Coffee: Enjoy the buns with a warm cup of tea or coffee for a perfect afternoon treat.
- As a Dessert: Serve the buns as a light dessert after a meal, perhaps with a scoop of vanilla ice cream.
Tips:
- Yeast Activity: Ensure your yeast is fresh and active for the best rise.
- Kneading: Don’t skimp on the kneading time! It’s crucial for developing the gluten and achieving a soft texture.
- Warm Place to Rise: Find a warm, draft-free place for the dough to rise. A slightly warm oven (turned off) or a sunny spot works well.
- Room Temperature Eggs: Using eggs at room temperature helps them incorporate more easily into the dough.
- Make Ahead: The dough can be made the day before and refrigerated overnight. This allows the flavors to develop even further.
- Freezing: Baked hot cross buns can be frozen for up to 2 months. Wrap them tightly in plastic wrap and then in foil. Thaw at room temperature before serving.
Prep Time: 30 minutes
Cook Time: 15-20 minutes
Total Time: Approximately 2 hours 15 minutes (including rising time)
Nutritional Information:
(Note: The following values are approximate and can vary based on specific ingredients and portion sizes)
- Calories: 250-300 per bun
- Protein: 5-7 grams
- Sodium: 150-200 mg
Conclusion
These Traditional Hot Cross Buns are more than just a recipe; they’re a celebration of tradition, flavor, and the joy of baking. By following this detailed recipe, you can recreate the warmth and comfort of homemade buns in your own kitchen. The result will be soft, spiced, and utterly delicious buns that are perfect for sharing with loved ones. Whether you’re making them for Easter, a special brunch, or simply to enjoy as a tasty treat, these Hot Cross Buns are sure to become a beloved favorite. So gather your ingredients, put on your apron, and get ready to experience the magic of baking these classic treats. Happy baking!
Questions and Answers about this Recipe:
Q1: Can I use a different type of dried fruit instead of currants or raisins?
A: Absolutely! While currants and raisins are traditional, you can definitely substitute with other dried fruits such as dried cranberries, chopped apricots, or even a mixture of different fruits. Just make sure to use the same quantity as the original recipe calls for (1 cup or 150 grams). Keep in mind that different fruits will impart slightly different flavors, so choose according to your preference.


