Description
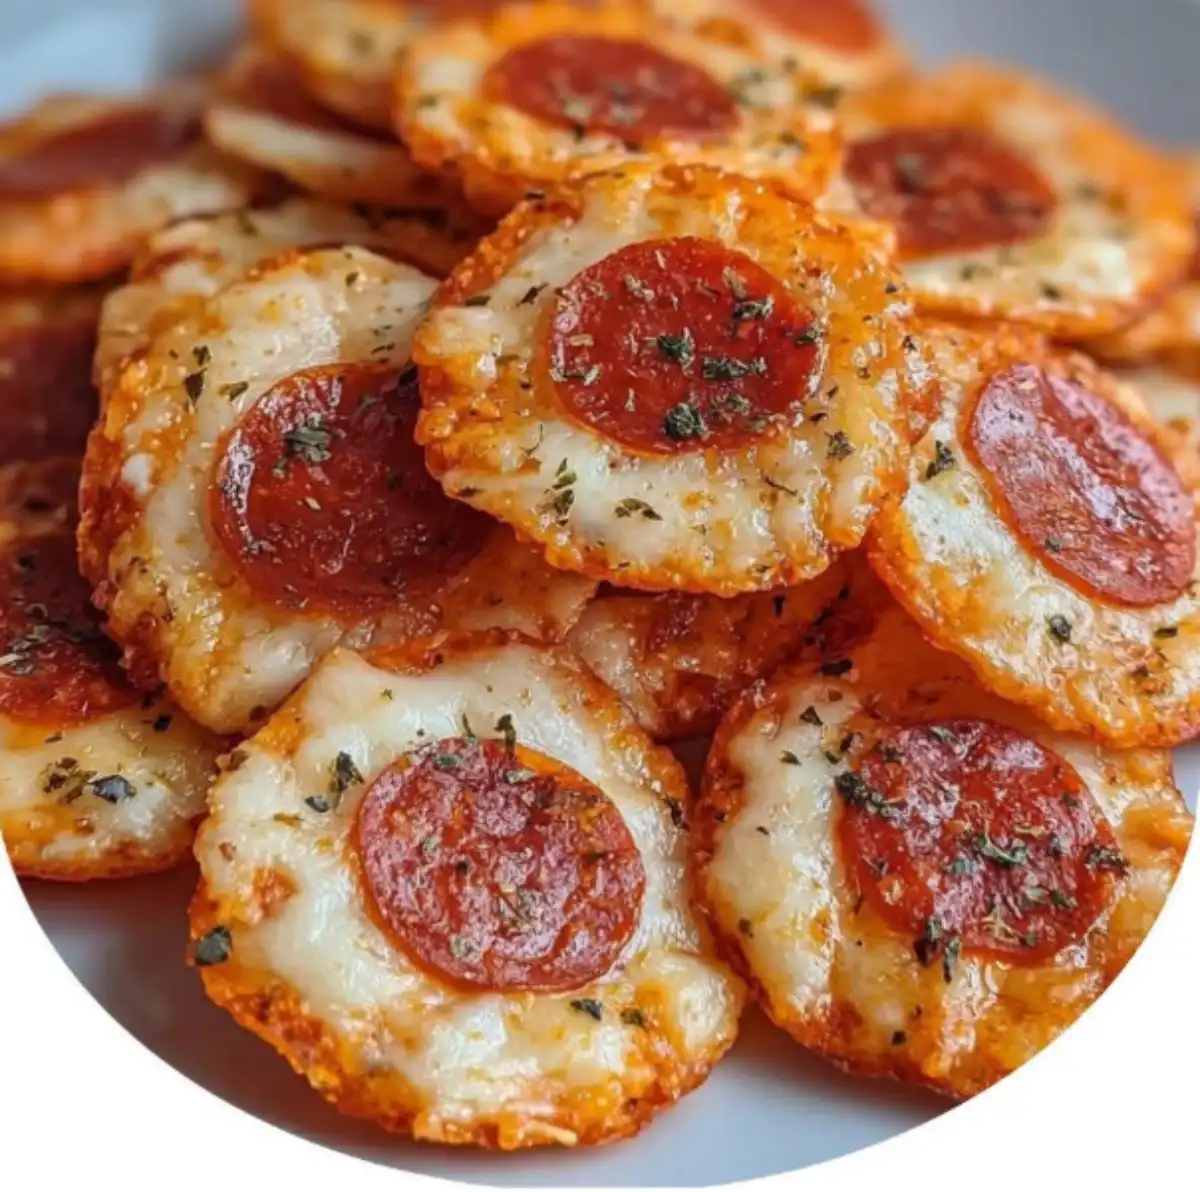
These pizza chips are a fun, easy, and delicious snack or appetizer that brings all the flavors of pizza into a crispy, cheesy bite. Perfect for parties, game days, or just a quick snack, they’re incredibly simple to make and endlessly customizable with your favorite pizza toppings. With just a handful of ingredients and a few minutes in the oven, you can enjoy a guilt-free treat that’s sure to be a hit with kids and adults alike.
Ingredients:
Main Ingredients
- 1 ½ cups shredded mozzarella cheese (low-moisture works best)
- ½ cup shredded Parmesan cheese
- 1 teaspoon Italian seasoning
- ¼ teaspoon garlic powder
- ¼ teaspoon onion powder
- ¼ teaspoon crushed red pepper flakes (optional for heat)
- Mini pepperoni slices or chopped pepperoni (about ½ cup)
- 2 tablespoons pizza sauce or marinara sauce (optional for drizzling)
Optional Toppings
- Crumbled cooked bacon
- Chopped black olives
- Diced bell peppers
- Sliced jalapeños
- Dried oregano or basil for garnish
For Dipping
- Marinara sauce
- Garlic butter
- Ranch dressing
- Spicy aioli
Preparation:
Step 1: Preheat Your Oven Preheat your oven to 400°F (200°C). Line your baking sheet with parchment paper or a silicone mat. This prevents sticking and ensures even browning.
Step 2: Prepare the Cheese Base In a medium bowl, mix the shredded mozzarella, Parmesan, Italian seasoning, garlic powder, onion powder, and red pepper flakes. Toss until the cheese is evenly coated with the seasonings.
Step 3: Form the Chips Scoop small mounds (about 1 tablespoon each) of the cheese mixture onto the prepared baking sheet. Flatten them slightly with the back of your spoon, leaving at least 2 inches between each to allow for spreading.
Step 4: Add Pepperoni Place one or two mini pepperoni slices on top of each cheese mound. You can also add small bits of toppings like diced peppers or olives if desired. Press them gently into the cheese so they stick as it melts.
Step 5: Bake Bake in the preheated oven for 8–10 minutes, or until the edges are golden brown and the cheese is bubbling. Keep a close eye during the last couple of minutes — they can go from perfectly crisp to burnt quickly.
Step 6: Cool and Crisp Once baked, remove the pizza chips from the oven. Let them cool on the baking sheet for 2–3 minutes, then transfer them to a cooling rack. As they cool, they’ll firm up and become crisp.
Step 7: Serve Serve warm or at room temperature with your favorite dipping sauce — marinara, garlic butter, or ranch all work beautifully.
Why You’ll Love This Recipe
These pizza chips are a fantastic alternative to traditional pizza, offering a low-carb, gluten-free option without sacrificing any of the flavor. They’re quick to prepare, customizable to suit any taste, and perfect for using up leftover cheese and toppings. Plus, they’re a fun, bite-sized snack that’s great for kids and adults alike.
Serving Suggestions:
- Serve as an appetizer at parties or gatherings.
- Enjoy as a snack during movie nights or game days.
- Pack in lunchboxes for a fun and tasty treat.
- Serve with a variety of dipping sauces for added flavor.
Tips:
- Use low-moisture mozzarella for the best crispy texture.
- Don’t overcrowd the baking sheet — leave enough space between chips for even cooking.
- Keep a close eye on the chips while baking to prevent burning.
- Experiment with different cheeses and toppings to create your own unique flavor combinations.
- For extra flavor, sprinkle dried oregano or basil over the chips before baking.
Preparation Time:
- Prep Time: 10 minutes
- Cook Time: 8-10 minutes
- Total Time: 18-20 minutes
Nutritional Information:
(Note: Nutritional information is approximate and may vary based on specific ingredients and portion sizes.)
- Calories: Approximately 75-100 calories per serving (5-6 chips)
- Protein: 6-8 grams per serving
- Sodium: 150-200 mg per serving
Conclusion
Pizza chips are a delightful and inventive way to enjoy the classic taste of pizza without the crust. Whether you’re looking for a low-carb snack, a fun appetizer, or a creative way to use up leftover ingredients, this recipe is sure to satisfy. Easy to customize and quick to make, these crispy, cheesy bites are perfect for any occasion.
Questions and Answers About This Recipe
Q1: Can I use pre-shredded cheese, or is it better to shred my own?
A1: Pre-shredded cheese works perfectly fine for this recipe, but freshly shredded cheese tends to melt more smoothly and evenly. It’s a matter of personal preference and convenience.
Q2: What other toppings can I add to these pizza chips?
A2: The possibilities are endless! Consider adding crumbled cooked bacon, chopped black olives, diced bell peppers, sliced jalapeños, cooked sausage, or even a sprinkle of dried oregano or basil.
Q3: How do I store leftover pizza chips?
A3: Store leftover pizza chips in an airtight container at room temperature. They are best enjoyed within 1-2 days, as they may lose some of their crispness over time. You can re-crisp them in a preheated oven or toaster oven for a few minutes.
Q4: Can I make these pizza chips ahead of time?
A4: Yes, you can prepare the cheese mixture ahead of time and store it in the refrigerator. When you’re ready to bake, simply scoop the mixture onto the baking sheet and follow the baking instructions.
Q5: What kind of dipping sauces go well with pizza chips?
A5: Marinara sauce is a classic choice, but garlic butter, ranch dressing, spicy aioli, or even a simple pesto sauce all pair wonderfully with pizza chips. Experiment and find your favorite combination!