Description
These Peanut Butter and Jelly Cookies combine the nostalgic flavors of a classic PB&J sandwich into a soft, chewy cookie. The peanut butter cookie base is rich and slightly salty, while the jelly filling adds a burst of sweet fruitiness. They’re easy to make, perfect for kids and adults alike, and sure to become a new favorite.
Ingredients:
- 1/2 cup (1 stick) unsalted butter, softened
- 1/2 cup creamy peanut butter
- 1/2 cup granulated sugar
- 1/2 cup packed brown sugar
- 1 large egg
- 1 tsp vanilla extract
- 1 1/4 cups all-purpose flour
- 1/2 tsp baking soda
- 1/4 tsp baking powder
- 1/4 tsp salt
- 1/2 cup jelly or jam (strawberry, grape, or raspberry work great)
- Chopped peanuts (optional, for garnish)
Preparation:
Step 1: Preheat your oven to 350°F (175°C). Line a baking sheet with parchment paper. This prevents the cookies from sticking and makes cleanup a breeze.
Step 2: In a large bowl, cream together the softened butter, peanut butter, granulated sugar, and packed brown sugar. Use an electric mixer (handheld or stand mixer) to cream the ingredients until they are light and fluffy. This usually takes 2-3 minutes. Creaming incorporates air into the mixture, resulting in a tender cookie.
Step 3: Beat in the egg and vanilla extract until well combined. Make sure the egg is fully incorporated into the batter.
Step 4: In a separate bowl, whisk together the all-purpose flour, baking soda, baking powder, and salt. Whisking ensures that the dry ingredients are evenly distributed, which is crucial for proper leavening and texture.
Step 5: Gradually add the dry ingredients to the wet ingredients, mixing just until combined. Be careful not to overmix the dough. Overmixing develops the gluten in the flour, which can result in tough cookies. Mix until the flour is just incorporated.
Step 6: Scoop about 2–3 tablespoons of dough per cookie and roll into balls. Place them on the prepared baking sheet, leaving space between each cookie. This allows the cookies to spread evenly while baking.
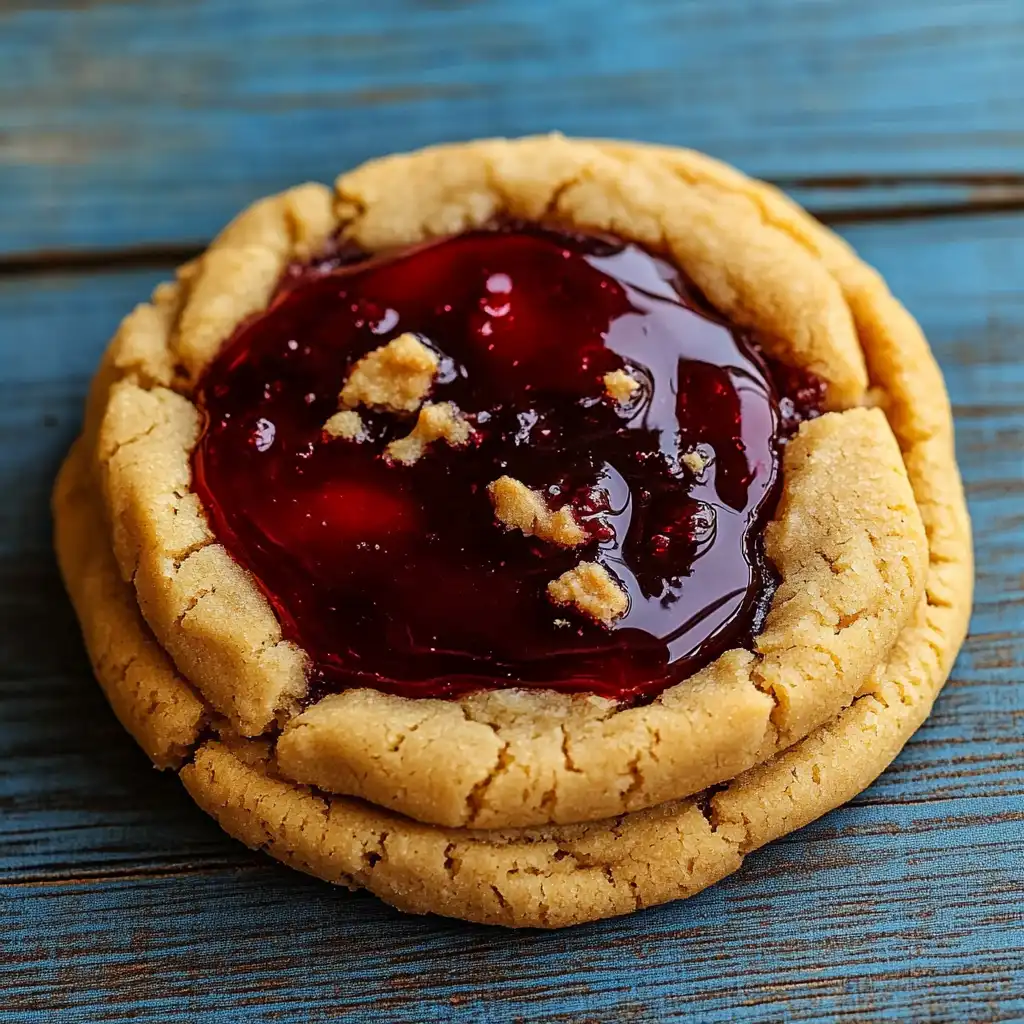
Step 7: Use your thumb or the back of a spoon to make a deep well in the center of each cookie (don’t press all the way through). This creates a space for the jelly filling.
Step 8: Bake cookies for about 10–12 minutes, until the edges are set but the centers are still soft. Keep a close eye on the cookies to prevent them from overbaking. They should be lightly golden around the edges.
Step 9: Remove the cookies from the oven, and while they are still warm, gently press the well again if needed. This helps to redefine the space for the jelly as the cookies spread during baking. Fill each well with about 1 teaspoon of your favorite jelly or jam.
Step 10: If desired, sprinkle the cookies with chopped peanuts. This adds a nice crunch and visual appeal. Let the cookies cool slightly on the baking sheet before transferring them to a wire rack to cool completely.
Why you’ll love this recipe:
This recipe is a delightful twist on a classic sandwich, offering a comforting and familiar flavor in a fun, cookie form. The combination of salty peanut butter and sweet jelly is irresistible. The cookies are also incredibly easy to make and customize, making them a great option for bakers of all skill levels.
Serving Suggestions:
- Serve these cookies as a sweet treat with a glass of milk.
- Pack them in lunchboxes for a nostalgic and satisfying snack.
- Offer them as a dessert at parties or gatherings.
- Enjoy them warm with a scoop of vanilla ice cream.
Tips:
- Make sure your butter is properly softened to ensure a smooth and creamy dough.
- Don’t overmix the dough, as this can result in tough cookies.
- Use your favorite type of jelly or jam to customize the flavor.
- For a richer peanut butter flavor, use natural peanut butter (just make sure to stir it well before using).
- Store the cookies in an airtight container at room temperature for up to 3 days.
Preparation Time: 20 minutes
Cook Time: 10-12 minutes
Total Time: 30-32 minutes
Nutrition Information: (per cookie, approximate)
- Calories: 150
- Protein: 3g
- Sodium: 75mg
Conclusion
Peanut Butter and Jelly Cookies are a fun and delicious treat that everyone will love. They’re easy to make, customizable, and perfect for satisfying your sweet cravings. Whether you’re a fan of the classic PB&J sandwich or just looking for a new cookie recipe to try, these cookies are sure to please.
Questions and Answers:
- Can I use a different type of nut butter? Yes, you can substitute other nut butters such as almond butter, cashew butter, or sunflower seed butter. Keep in mind that this will change the flavor profile of the cookies.
- Can I use a different type of flour? For best results, use all-purpose flour. However, you can experiment with whole wheat flour for a slightly denser and nuttier cookie. You may need to adjust the amount of liquid in the recipe if you use whole wheat flour.
- Can I make these cookies ahead of time? Yes, you can make the dough ahead of time and store it in the refrigerator for up to 2 days. Let the dough come to room temperature slightly before scooping and baking.
- How do I prevent the jelly from burning during baking? To prevent the jelly from burning, add it after the cookies have baked for a few minutes. Remove the cookies from the oven, gently press the wells again, fill with jelly, and then return them to the oven for the last few minutes of baking.
- Can I freeze these cookies? Yes, you can freeze the baked cookies. Let them cool completely, then store them in an airtight container or freezer bag for up to 2 months. Thaw at room temperature before serving.