Description
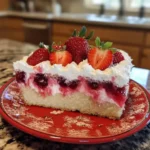
This No-Bake Strawberry Jello Lasagna is a delightful and visually stunning dessert that combines the classic flavors of strawberry Jello and creamy cheesecake into an easy-to-make layered treat. Perfect for potlucks, summer gatherings, or any occasion where you need a refreshing and crowd-pleasing dessert, this lasagna offers a symphony of textures and tastes that will have everyone coming back for seconds. The buttery Golden Oreo crust provides a solid foundation for the creamy cheesecake layer, followed by a vibrant strawberry Jello middle studded with fresh strawberries, all topped with a fluffy Cool Whip frosting. Best of all, it requires no baking, making it an ideal dessert for hot days or when you want to avoid turning on the oven.
Why You Will Love This Recipe
You’ll adore this recipe for several reasons. First, it’s incredibly easy to make, even for novice bakers. With simple steps and readily available ingredients, you can whip up this impressive dessert in no time. Second, the combination of flavors is simply irresistible. The sweetness of the Jello and Cool Whip is perfectly balanced by the slightly tangy cream cheese and the buttery Oreo crust. The fresh strawberries add a burst of freshness that elevates the entire dish. Third, it’s a customizable dessert. You can easily swap out the strawberry Jello for other flavors like raspberry or cherry, or use different types of fruit depending on your preference. Finally, it’s a guaranteed crowd-pleaser. Its vibrant colors and layered presentation make it a feast for the eyes, while its delicious taste ensures that everyone will enjoy it. This No-Bake Strawberry Jello Lasagna is the perfect dessert to impress your friends and family without spending hours in the kitchen. Whether it’s for a quick weeknight treat or a festive holiday gathering, this recipe promises a sweet and refreshing experience.
Ingredients:
- Golden Oreos – 36 cookies (crushed)
- These make the perfect buttery crust for our dessert. Use a food processor to quickly crush the cookies to a fine crumb.
- Butter – 6 tbsp (melted)
- This helps the crust hold together. Melt it in the microwave to save time.
- Cream Cheese – 1 package (8 oz, softened)
- The base layer needs this creamy goodness. Make sure it’s softened to blend easily.
- Powdered Sugar – 1 cup
- Sweetens the cream cheese layer to perfection.
- Cool Whip – 2 cups (divided)
- Gives a light and fluffy texture. Use half for the cheesecake layer and the rest on top.
- Strawberry Jello – 1 package (3 oz)
- The star flavor of our lasagna! Prepare according to package instructions for an easy middle layer.
- Strawberries – 1 cup (fresh, sliced)
- Adds freshness and texture to the dessert. Use ripe strawberries for the best flavor.
- Milk – 1 cup
- For thinning out the cream cheese layer slightly, making it smooth and spreadable.
Preparation:
Step 1: Prepare the Crust
Start by crushing the Golden Oreo cookies. The easiest and most efficient way to do this is by using a food processor. Pulse the cookies until they are reduced to fine crumbs. If you don’t have a food processor, you can place the cookies in a large zip-top bag and crush them with a rolling pin or the bottom of a heavy glass. Ensure you break them down into a consistent, fine texture for the best crust.
Next, melt the butter. You can do this in the microwave in 30-second intervals, stirring in between, until fully melted. Be careful not to overheat the butter, as it can splatter.
In a medium bowl, combine the crushed Oreo crumbs and the melted butter. Mix well until the crumbs are evenly coated with the butter. This mixture should resemble wet sand.
Transfer the mixture to a 9×13-inch pan. Press the crumb mixture firmly and evenly into the bottom of the pan. Use the bottom of a measuring cup or a spatula to ensure the crust is compacted and smooth. A well-compacted crust will hold its shape and provide a solid base for the other layers. Once the crust is prepared, place the pan in the refrigerator to chill while you prepare the other layers. Chilling the crust helps it to firm up and prevents it from becoming soggy when the creamy layers are added.
Step 2: Make the Cream Cheese Layer
Ensure that your cream cheese is adequately softened. This is crucial for creating a smooth and lump-free cream cheese layer. If the cream cheese is not softened enough, it can be difficult to blend and may result in a grainy texture. You can leave the cream cheese at room temperature for about 30 minutes to an hour, or you can microwave it for a few seconds at a time until it softens, being careful not to melt it.
In a mixing bowl, beat the softened cream cheese using an electric mixer until it is smooth and creamy. This step is essential to eliminate any lumps and create a velvety base.
Add the powdered sugar to the cream cheese and continue beating until well combined. The powdered sugar adds sweetness to the cream cheese layer and helps to create a smooth texture.
Next, add the milk and fold in 1 cup of Cool Whip gently until well combined. The milk thins out the cream cheese mixture slightly, making it easier to spread, while the Cool Whip adds a light and fluffy texture. Be gentle when folding in the Cool Whip to avoid deflating it.
Remove the chilled crust from the refrigerator. Spread the cream cheese mixture evenly over the chilled Oreo crust. Use a spatula to ensure the layer is smooth and uniform. Return the pan to the refrigerator to chill while you prepare the Jello layer. Chilling this layer will help it to set slightly before adding the Jello, preventing it from seeping into the crust.
Step 3: Prepare the Jello Layer
Prepare the strawberry Jello according to the package instructions. Typically, this involves dissolving the Jello powder in boiling water, then adding cold water and stirring until the Jello is fully dissolved. Follow the specific instructions on your Jello package for the best results.
Let the Jello cool slightly before pouring it over the cream cheese layer. It’s important that the Jello is not too hot, as this could melt the cream cheese layer and cause the colors to bleed. However, it should not be allowed to set completely, as this would prevent it from bonding with the cream cheese layer.
Remove the pan from the refrigerator. Pour the cooled Jello mixture carefully and evenly over the cream cheese layer. To distribute the strawberries more evenly, sprinkle the fresh strawberry slices over the Jello layer before it sets. The strawberries add a burst of fresh flavor and a delightful texture to the dessert.
Place the pan back in the refrigerator to allow the Jello layer to set completely. This usually takes about 2 to 3 hours. Ensure the Jello is firm before proceeding to the next step.
Step 4: Add Final Layer of Cool Whip
Once the Jello has fully set, remove the pan from the refrigerator. Spread the remaining cup of Cool Whip evenly over the top of the dessert. Use a spatula or a knife to create a smooth and uniform layer.
For an extra touch of elegance, add more sliced strawberries and decorate with whipped cream swirls. You can use a piping bag fitted with a decorative tip to create beautiful swirls, or simply dollop the whipped cream in decorative patterns. The additional strawberries and whipped cream add visual appeal and enhance the overall flavor of the dessert.
Step 5: Chill and Serve
Let the entire lasagna chill in the refrigerator for at least 3 hours before slicing and serving. This allows all the layers to firm up and the flavors to meld together, resulting in a more cohesive and delicious dessert. For best results, you can chill the lasagna overnight.
When ready to serve, slice the lasagna into squares and serve cold. Use a sharp knife to ensure clean cuts. The lasagna can be stored in the refrigerator for up to 3 days.
COOKING Rating:
Easy
Serving Suggestions:
- Serve chilled as a refreshing dessert on a warm day.
- Garnish with extra sliced strawberries, blueberries, or raspberries.
- Drizzle with a strawberry sauce or chocolate syrup for added sweetness.
- Serve with a scoop of vanilla ice cream or a dollop of whipped cream.
- Pair with a light and fruity beverage, such as lemonade or iced tea.
Tips:
- Make sure the cream cheese is fully softened to avoid lumps in the cheesecake layer.
- Let the Jello cool slightly before pouring it over the cream cheese layer to prevent melting.
- Chill the lasagna for at least 3 hours (or overnight) for the best flavor and texture.
- Use a food processor to crush the Oreo cookies quickly and evenly.
- Get creative with your toppings! Try adding other fruits, chocolate shavings, or sprinkles.
- Use sugar-free Jello and Cool Whip for a lighter version.
- To ensure clean slices, run a knife under hot water before each cut.
- If you don’t have Golden Oreos, you can use regular Oreos or graham crackers for the crust.
Prep Time: 20 minutes Cook Time: 0 minutes (No-bake) Total Time: 3 hours 20 minutes (includes chilling time)
Nutritional Information: (per serving, approximate)
- Calories: 350
- Protein: 5g
- Sodium: 200mg
Conclusion
The No-Bake Strawberry Jello Lasagna is a delightful and easy-to-make dessert that’s perfect for any occasion. Its layers of buttery Oreo crust, creamy cheesecake, refreshing strawberry Jello, and fluffy Cool Whip create a harmonious blend of flavors and textures that will tantalize your taste buds. With minimal effort and readily available ingredients, you can impress your friends and family with this visually stunning and delicious treat. So, gather your ingredients, follow the simple steps, and prepare to enjoy a sweet and refreshing dessert that everyone will love.
Questions and Answers about This Recipe:
Q1: Can I use a different flavor of Jello?
A: Absolutely! One of the great things about this recipe is its versatility. While strawberry Jello is a classic choice, you can easily substitute it with other flavors like raspberry, cherry, or even lime Jello, depending on your preference. Just make sure the flavor complements the other ingredients. For instance, a raspberry Jello would pair beautifully with fresh raspberries sprinkled in the Jello layer.
Q2: What can I use if I don’t have Cool Whip?
A: If you don’t have Cool Whip on hand, you can substitute it with homemade whipped cream. To make homemade whipped cream, you’ll need heavy cream, powdered sugar, and vanilla extract. Beat the heavy cream with an electric mixer until soft peaks form, then gradually add the powdered sugar and a teaspoon of vanilla extract. Continue beating until stiff peaks form. Be careful not to overwhip, or the cream will turn grainy. The flavor of homemade whipped cream is often richer and more luxurious than Cool Whip, adding a touch of elegance to your dessert.
Q3: How can I make this lasagna dairy-free?
A: To make this lasagna dairy-free, you’ll need to find dairy-free alternatives for the cream cheese and Cool Whip. There are several dairy-free cream cheese substitutes available in most grocery stores. Make sure to choose one that is smooth and creamy. For the Cool Whip, you can use a coconut whipped cream or a similar dairy-free whipped topping. Also, ensure the Oreo cookies you use are dairy-free; some brands may contain traces of dairy. With these substitutions, you can enjoy a dairy-free version of this delicious lasagna without compromising on flavor or texture.
Q4: Can I make this ahead of time?
A: Yes, this lasagna is a great make-ahead dessert! In fact, it’s often better when made in advance, as it allows the flavors to meld together and the layers to set properly. You can prepare the entire lasagna up to 24 hours before serving. Just make sure to store it in the refrigerator, covered with plastic wrap, to prevent it from drying out or absorbing any odors from the fridge. When you’re ready to serve, simply slice and enjoy.
Q5: How do I prevent the Oreo crust from becoming soggy?
A: To prevent the Oreo crust from becoming soggy, ensure that the melted butter is evenly distributed throughout the crushed Oreo crumbs. Press the mixture firmly and evenly into the bottom of the pan to create a compact layer. Chilling the crust in the refrigerator before adding the creamy layers will also help it to firm up and prevent it from absorbing too much moisture. If you’re making the lasagna a day in advance, you can also brush the bottom of the crust with a thin layer of melted chocolate to create a moisture barrier.


