Description
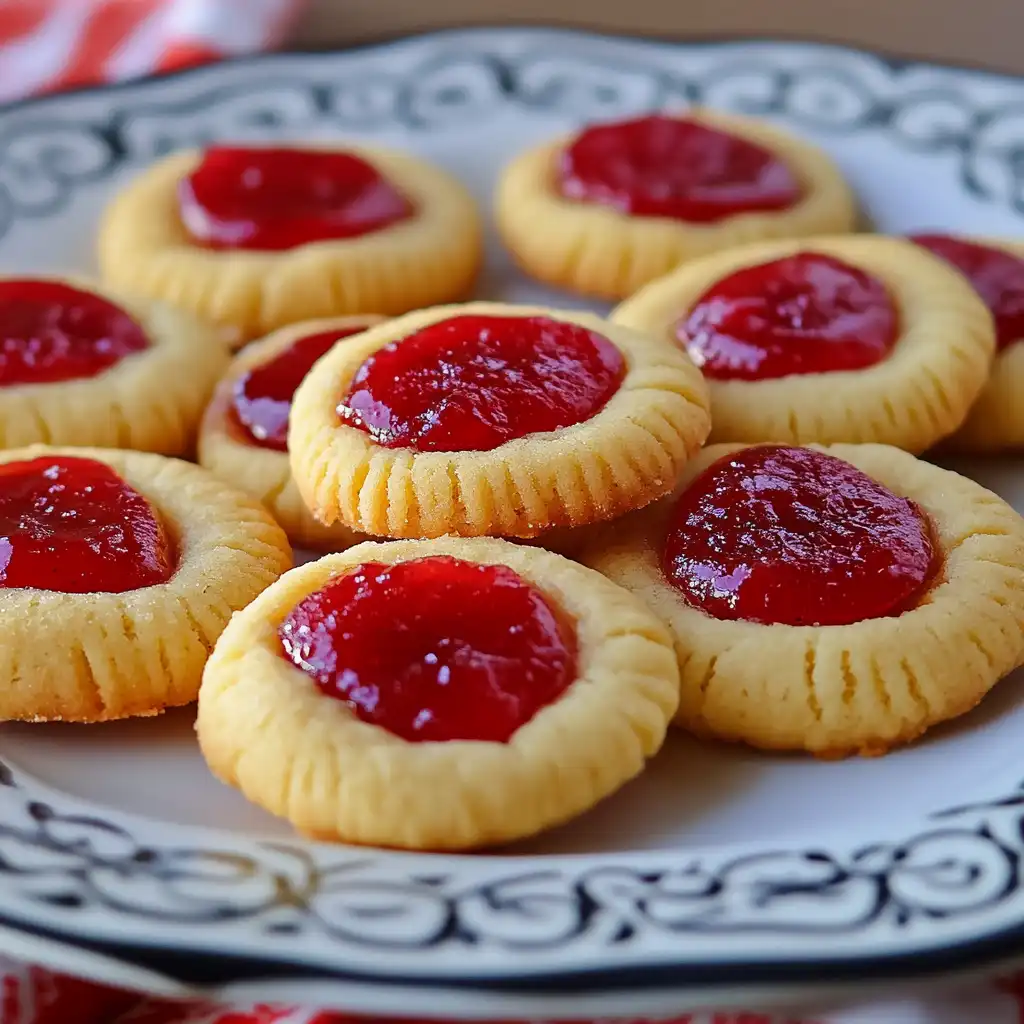
These delightful Jam Thumbprint Cookies are a classic treat, perfect for any occasion. Buttery and tender, with a sweet jam filling, they’re easy to make and endlessly customizable with your favorite flavors. This recipe delivers consistent results and is sure to become a family favorite.
Ingredients:
- 1 cup (2 sticks) unsalted butter, softened
- ½ cup granulated sugar
- 2 large egg yolks
- 1 teaspoon vanilla extract
- 2 ¼ cups all-purpose flour
- ¼ teaspoon salt
- ½ cup jam (strawberry, raspberry, apricot, or your favorite flavor)
Preparation:
Step 1: Preheat and Prep
Preheat your oven to 350°F (175°C). Line a baking sheet with parchment paper or a silicone baking mat. This prevents sticking and makes cleanup a breeze.
Step 2: Cream Butter and Sugar
In a large bowl, using an electric mixer (or by hand with a lot of elbow grease), beat the softened butter and granulated sugar together until light and fluffy. This usually takes about 3-5 minutes. Properly creaming the butter and sugar is crucial for creating a tender cookie.
Step 3: Add Egg Yolks and Vanilla
Mix in the egg yolks and vanilla extract until the mixture is smooth and well combined. The egg yolks add richness and moisture to the cookies, while the vanilla extract enhances the overall flavor.
Step 4: Combine Dry Ingredients
In a separate bowl, whisk together the all-purpose flour and salt. This ensures that the salt is evenly distributed throughout the dough.
Step 5: Gradually Add Dry Ingredients to Wet Ingredients
Gradually add the flour mixture to the butter mixture, mixing on low speed until just combined. Be careful not to overmix the dough, as this can result in tough cookies. The dough should be soft and slightly sticky.
Step 6: Shape the Cookies
Roll the dough into 1-inch balls. Place the dough balls on the prepared baking sheet, leaving a little space between each cookie.
Step 7: Make the Thumbprints
Using your thumb or the back of a small spoon, gently press an indentation into the center of each ball.
Step 8: Fill with Jam
Fill each indentation with about ½ teaspoon of your favorite jam. Strawberry, raspberry, and apricot are all classic choices, but feel free to experiment with other flavors.
Step 9: Bake
Bake for 10–12 minutes, or until the edges of the cookies are lightly golden. Keep a close eye on them, as baking times may vary depending on your oven.
Step 10: Cool
Let the cookies cool on the baking sheet for a few minutes before transferring them to a wire rack to cool completely.
Why You’ll Love This Recipe
- Simple Ingredients: This recipe uses basic pantry staples, making it easy to whip up whenever you have a craving.
- Customizable: The jam filling can be easily customized to suit your taste preferences.
- Perfect for Any Occasion: These cookies are great for holidays, parties, or just a simple afternoon treat.
- Easy to Make: The recipe is straightforward and easy to follow, even for beginner bakers.
- Delicious Flavor: The combination of buttery, tender cookie and sweet jam filling is simply irresistible.
Serving Suggestions:
- Serve these cookies with a glass of cold milk or a cup of hot tea or coffee.
- They make a beautiful addition to any dessert platter or cookie exchange.
- Package them in a decorative tin or box for a thoughtful homemade gift.
Tips:
- Use Softened Butter: Make sure your butter is softened to room temperature before creaming it with the sugar. This will ensure that the cookies are light and tender.
- Don’t Overmix: Overmixing the dough can result in tough cookies. Mix the dry ingredients into the wet ingredients until just combined.
- Chill the Dough (Optional): If the dough is too sticky to handle, you can chill it in the refrigerator for 30 minutes before rolling it into balls.
- Vary the Jam: Experiment with different flavors of jam to create your own signature thumbprint cookies.
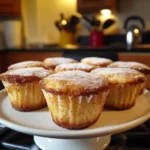
- Dust with Powdered Sugar: For an extra touch of sweetness and elegance, dust the cooled cookies with powdered sugar.
Preparation Time:
- Prep Time: 20 minutes
- Cook Time: 10-12 minutes
- Total Time: 30-32 minutes
Nutrition Information:
(Note: Nutritional information is an estimate and will vary depending on the specific ingredients used.)
- Calories: Approximately 120 per cookie
- Protein: 1 gram
- Sodium: 20mg
Conclusion
Jam Thumbprint Cookies are a delightful and versatile treat that are sure to please. With their buttery texture and sweet jam filling, they’re perfect for any occasion. This recipe is easy to follow and allows for plenty of customization, so you can create your own unique version of this classic cookie. Enjoy baking and sharing these delicious cookies with your friends and family!
Questions and Answers:
Q1: Can I use different types of flour for this recipe?
A: While all-purpose flour is recommended for the best results, you can experiment with other types of flour, such as whole wheat flour or gluten-free flour blends. Keep in mind that this may affect the texture and taste of the cookies. If using gluten-free flour, be sure to use a blend that is designed for baking.
Q2: Can I make the dough ahead of time?
A: Yes, you can make the dough ahead of time and store it in the refrigerator for up to 2 days. Wrap the dough tightly in plastic wrap to prevent it from drying out. When you’re ready to bake the cookies, let the dough sit at room temperature for about 15-20 minutes to soften slightly before rolling it into balls.
Q3: What can I use if I don’t have jam?
A: If you don’t have jam on hand, you can use other sweet fillings, such as Nutella, peanut butter, or caramel. You can also make your own simple fruit filling by simmering chopped fruit with a little sugar and water until thickened.
Q4: How do I store these cookies?
A: Store the cooled cookies in an airtight container at room temperature. They will stay fresh for up to 3-5 days. You can also freeze the cookies for longer storage.
Q5: Can I add nuts or sprinkles to these cookies?
A: Absolutely! You can add chopped nuts to the dough or sprinkle them on top of the cookies before baking. You can also decorate the cooled cookies with sprinkles or a drizzle of melted chocolate. Get creative and have fun with it!