Description
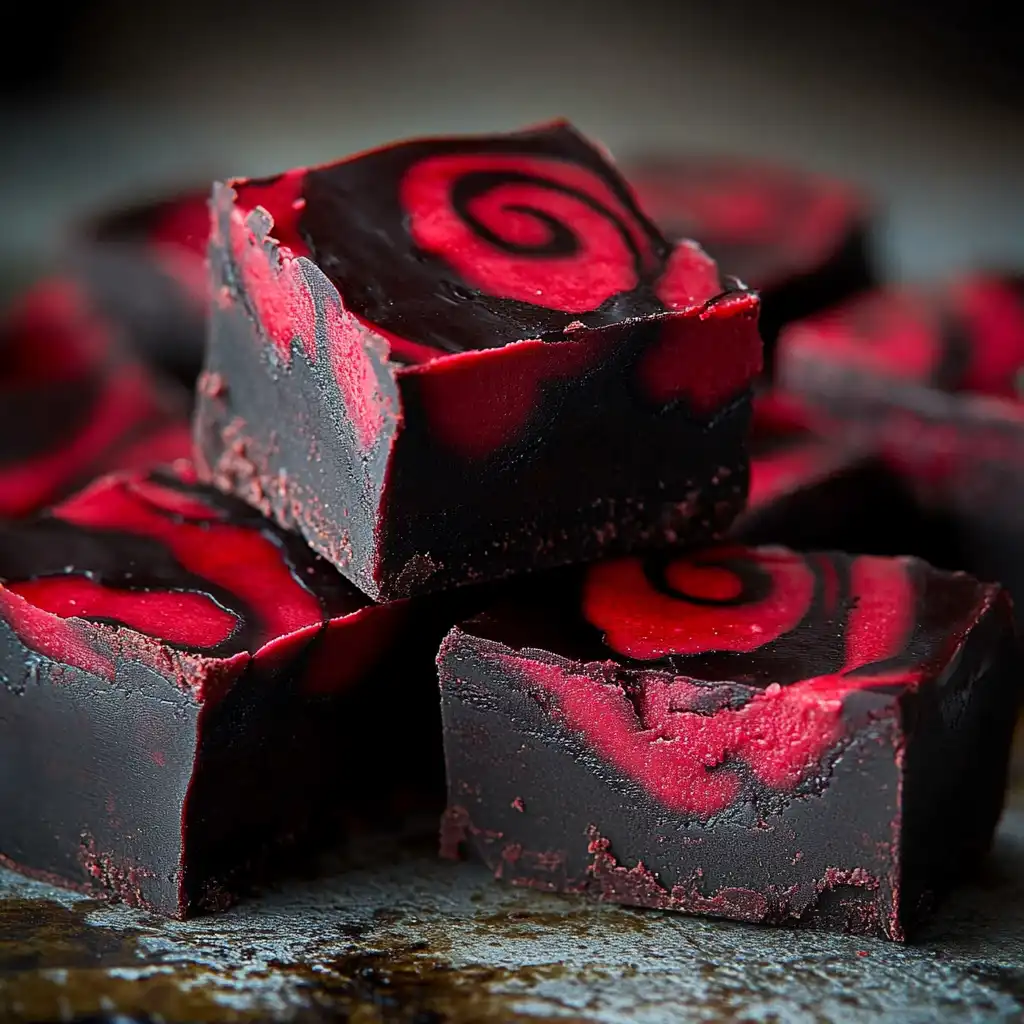
Indulge in the spooky spirit of Halloween with this decadent Vampire Fudge! This easy-to-make treat features a rich chocolate base swirled with creamy red and black-colored white chocolate fudge, creating a visually stunning and delicious dessert that’s perfect for parties or a spooky night in.
Ingredients:
- 1½ cups semi-sweet chocolate chips (for the bottom layer)
- 2 tablespoons butter
- 3 cups white chocolate chips
- 1 can (14 oz) sweetened condensed milk
- 1 teaspoon vanilla extract
- Red gel food coloring
- Black gel food coloring
Preparation:
Step 1: Prepare the Pan: Line an 8×8-inch baking dish with parchment paper, leaving some overhang for easy removal. This ensures that the fudge can be easily lifted out once it has set, preventing any sticking and making for clean cuts.
Step 2: Create the Chocolate Base: In a microwave-safe bowl, melt the semi-sweet chocolate chips with butter in 30-second intervals, stirring until smooth. The addition of butter adds a slight richness and helps to create a smooth, glossy base. Spread the melted chocolate evenly into the prepared pan to form the bottom layer.
Step 3: Chill the Base: Place the baking dish with the chocolate base in the refrigerator while you prepare the top layer. This chilling process helps the base to solidify, providing a stable foundation for the fudge swirls.
Step 4: Melt White Chocolate Mixture: In another microwave-safe bowl, melt the white chocolate chips with sweetened condensed milk in 30-second bursts, stirring until smooth. Sweetened condensed milk is key to the fudge’s creamy texture. Stir in the vanilla extract for an enhanced flavor.
Step 5: Divide and Color: Divide the white chocolate mixture evenly into two bowls. Tint one bowl with red gel food coloring and the other with black gel food coloring. Gel food coloring is recommended as it provides intense color without altering the consistency of the fudge.
Step 6: Create Swirls: Drop spoonfuls of the red and black fudge mixtures over the chilled chocolate base. Use a knife or skewer to swirl them together into a marbled design. Be creative with your swirls to achieve a unique, blood-splatter effect.
Step 7: Refrigerate: Refrigerate the fudge for at least 2 hours, or until firm. This is a crucial step as it allows the fudge to fully set and develop its rich flavor.
Step 8: Serve: Lift the fudge out of the pan using the parchment paper overhang, cut into squares, and serve.
Why you’ll love this recipe
- Visually Stunning: The marbled red and black swirls create a striking, Halloween-themed dessert.
- Easy to Make: With just a few simple steps, this fudge comes together quickly.
- Rich and Decadent: The combination of chocolate and creamy fudge is irresistible.
- Customizable: You can easily adjust the colors and add-ins to suit your preferences.
- Perfect for Parties: A guaranteed hit at any Halloween gathering.
Serving Suggestions:
- Serve chilled for the best texture and flavor.
- Pair with a glass of milk or a scoop of vanilla ice cream.
- Arrange on a platter with other Halloween treats for a spooky dessert spread.
- Drizzle with raspberry sauce for a “bloody” effect.
Tips:
- Use high-quality chocolate chips for the best flavor.
- Don’t overheat the chocolate, as it can become grainy.
- Work quickly when swirling the colors together to prevent the fudge from setting too fast.
- Store leftover fudge in an airtight container in the refrigerator.
Preparation Time: 15 minutes Cook Time: 5 minutes Total Time: 2 hours 20 minutes (includes chilling time)
Nutrition Information: (Per serving, approximate) Note: Nutritional information is an estimate and can vary based on specific ingredients and serving size.
- Calories: 250
- Protein: 3g
- Sodium: 50mg
Conclusion
This Halloween Vampire Fudge is the perfect combination of spooky and sweet, making it an ideal treat for Halloween parties or a fun dessert to enjoy on a cool autumn evening. With its simple preparation and visually stunning appearance, it’s sure to be a crowd-pleaser. So, grab your ingredients, get into the Halloween spirit, and whip up a batch of this delicious fudge. Happy haunting!
Questions and Answers about this recipe:
Q1: Can I use different types of chocolate for this recipe? A1: Absolutely! Feel free to experiment with different types of chocolate. For the base, dark chocolate can add a richer flavor, while milk chocolate provides a sweeter taste. For the top layer, you can even use flavored white chocolate, such as cookies and cream, for a unique twist.
Q2: How can I make the fudge more “bloody” looking? A2: To enhance the bloody effect, you can drizzle raspberry or strawberry sauce over the fudge squares before serving. Alternatively, you can add a few drops of red food coloring to a small amount of white chocolate and drizzle it over the top for a marbled effect.
Q3: What if I don’t have gel food coloring? Can I use liquid food coloring? A3: While gel food coloring is recommended for its vibrant color and minimal impact on consistency, you can use liquid food coloring as a substitute. Be mindful that liquid food coloring may slightly alter the texture of the fudge, so use it sparingly to achieve the desired color without making the mixture too thin.
Q4: How long does the fudge last? A4: Properly stored, this fudge can last up to two weeks in the refrigerator. Be sure to keep it in an airtight container to prevent it from drying out or absorbing other flavors from the refrigerator.
Q5: Can I add any other ingredients to the fudge? A5: Of course! Feel free to get creative with your add-ins. Crushed cookies, chopped nuts, mini marshmallows, or even candy pieces can be stirred into the red and black layers for added texture and flavor. Just make sure not to add too many ingredients, as this could affect the overall consistency of the fudge.