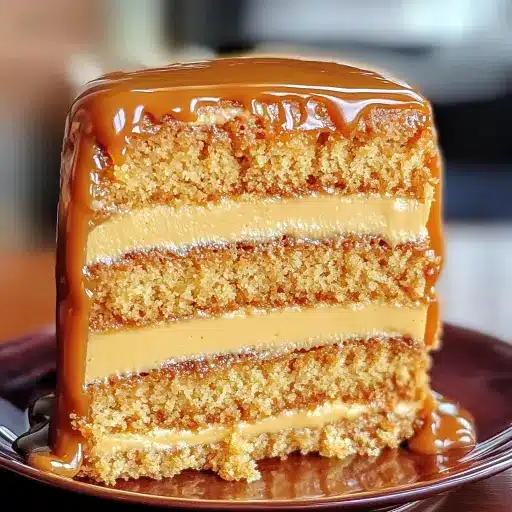
This Caramel Butterscotch Layer Cake is a symphony of sweet and buttery flavors. The moist butterscotch-infused cake layers are filled with a creamy butterscotch filling and drizzled with homemade caramel. Every bite is an indulgence that will leave you craving more.
Ingredients:
For the Butterscotch Cake:
- 2 ½ cups all-purpose flour
- 2 tsp baking powder
- ½ tsp baking soda
- ½ tsp salt
- 1 cup unsalted butter (softened)
- 1 ½ cups light brown sugar (packed)
- ½ cup granulated sugar
- 4 large eggs
- 1 tbsp vanilla extract
- 1 cup buttermilk
For the Butterscotch Filling:
- ½ cup unsalted butter
- 1 cup light brown sugar (packed)
- ½ tsp salt
- ¾ cup heavy cream
- 1 tsp vanilla extract
- 1 ½ cups powdered sugar (sifted)
For the Caramel Drizzle:
- 1 cup sugar
- 6 tbsp unsalted butter
- ½ cup heavy cream (warm)
- Pinch of salt
For Garnish (Optional):
- Extra caramel drizzle
- Butterscotch chips or toffee bits
Preparation:
Step 1: Make the cake batter
Whisk together the flour, baking powder, baking soda, and salt in a bowl. In another bowl, cream together the softened butter, light brown sugar, and granulated sugar until light and fluffy. Beat in the eggs one at a time, then stir in the vanilla extract. Alternately add the dry ingredients and buttermilk to the creamed mixture, beginning and ending with the dry ingredients, and mix until just combined.
Step 2: Bake the cake layers
Divide the batter evenly into three greased and floured 8-inch cake pans. Bake in a preheated oven at 350°F (175°C) for 22–25 minutes, or until a wooden skewer inserted into the center comes out clean. Let the cakes cool in the pans for 10 minutes before inverting them onto a wire rack to cool completely.
Step 3: Prepare the butterscotch filling
In a saucepan, melt the butter over medium heat. Add the brown sugar and salt, and cook, stirring constantly, until the sugar is dissolved and the mixture is bubbling. Stir in the heavy cream and bring to a simmer. Cook for 1-2 minutes, stirring constantly, until the sauce has thickened slightly. Remove from heat and stir in the vanilla extract. Let the mixture cool slightly before whisking in the powdered sugar until the filling is smooth and spreadable.
Step 4: Make the caramel drizzle
In a heavy-bottomed saucepan, melt the sugar over medium heat, stirring occasionally, until it turns into a golden amber color. Remove from heat and carefully whisk in the butter until melted. Slowly pour in the warm heavy cream, stirring constantly (be careful, as the mixture will bubble vigorously). Add a pinch of salt. Return the saucepan to low heat and cook, stirring constantly, until the caramel is smooth and glossy. Let the caramel cool slightly before using.
Step 5: Assemble the cake
Place one cake layer on a serving plate or cake stand. Spread a thick layer of butterscotch filling over the cake layer. Top with the second cake layer and spread with more butterscotch filling. Place the third cake layer on top.
Step 6: Garnish & serve
Pour the warm caramel drizzle over the top of the cake, allowing it to cascade down the sides. If desired, garnish with an extra drizzle of caramel and a sprinkle of butterscotch chips or toffee bits. Slice and serve.
Why You’ll Love This Recipe
- Decadent Flavors: The combination of butterscotch and caramel creates a rich and unforgettable flavor profile.
- Moist and Tender Cake: The buttermilk in the cake batter ensures a moist and tender crumb.
- Homemade Goodness: Made from scratch, this cake tastes far superior to store-bought versions.
- Impressive Presentation: The cascading caramel and optional garnishes make this cake a showstopper.
Serving Suggestions:
- Serve chilled or at room temperature.
- Pair with a scoop of vanilla ice cream or a dollop of whipped cream.
- Enjoy with a cup of coffee or tea.
Tips:
- Make sure your butter is softened for the cake batter to ensure a smooth and creamy texture.
- Don’t overbake the cake layers, as they can become dry.
- Let the butterscotch filling cool slightly before adding the powdered sugar to prevent it from melting.
- Warm the heavy cream before adding it to the caramel to prevent the sugar from seizing.
- If the caramel becomes too thick, add a tablespoon of warm water at a time until it reaches the desired consistency.
Preparation Time: 45 minutes
Cook Time: 25 minutes
Total Time: 1 hour 10 minutes
Nutrition Information: (Per slice, approximate)
Calories: 650
Protein: 6g
Sodium: 300mg
Conclusion:
This Caramel Butterscotch Layer Cake is a delightful treat that’s perfect for special occasions or any time you want to indulge in a decadent dessert. The combination of buttery, caramel-y, and sweet flavors, combined with its appealing presentation, makes it a guaranteed crowd-pleaser. So, gather your ingredients and bake up a slice of happiness!
Questions and Answers:
Q1: Can I make this cake ahead of time?
- A: Yes, you can bake the cake layers and make the butterscotch filling and caramel drizzle a day in advance. Store the cake layers in an airtight container at room temperature, and refrigerate the filling and caramel separately. Assemble the cake just before serving.
Q2: Can I freeze this cake?
- A: Yes, you can freeze the assembled cake. Wrap it tightly in plastic wrap and then in foil. Freeze for up to 2 months. Thaw overnight in the refrigerator before serving.
Q3: Can I use a different type of sugar for the caramel?
- A: Granulated sugar is recommended for the caramel, as it melts evenly and creates a beautiful amber color. You can experiment with other sugars, but the results may vary.
Q4: Can I add nuts to this cake?
- A: Absolutely! Chopped pecans or walnuts would be a delicious addition to the butterscotch filling or as a garnish on top of the cake.
Q5: What if I don’t have buttermilk?
- A: You can make a buttermilk substitute by adding 1 tablespoon of white vinegar or lemon juice to a liquid measuring cup, then filling the cup with milk to the 1-cup line. Let it stand for 5 minutes before using.