Description
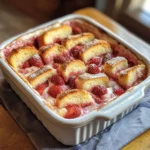
These Apple Pie Biscuits are a delightful fusion of classic comfort food. They combine the ease of refrigerated biscuits with the warm, comforting flavors of apple pie. Perfect for a quick breakfast treat, a cozy dessert, or a sweet addition to brunch, these biscuits are easy to make and a guaranteed crowd-pleaser. The flaky, buttery biscuit exterior gives way to a soft, apple-cinnamon filling, all topped with a sweet vanilla glaze. It’s apple pie in biscuit form – what’s not to love?
Ingredients:
- 2 tablespoons brown sugar
- 1 teaspoon ground cinnamon
- ½ teaspoon vanilla extract
- 1 can (16.3 oz) refrigerated biscuit dough (such as Pillsbury Grands!)
- 1 cup apple pie filling, finely chopped
- 1 tablespoon melted butter (for brushing)
For the Glaze:
- ½ cup powdered sugar
- 1–2 tablespoons milk
- ½ teaspoon vanilla extract
Preparation:
Step 1: Preheat and Prep: Preheat your oven to 375°F (190°C). Grease a baking sheet or line it with parchment paper. This will prevent the biscuits from sticking and make cleanup easier.
Step 2: Prepare Apple Filling: In a medium bowl, combine the finely chopped apple pie filling, brown sugar, cinnamon, and ½ teaspoon of vanilla extract. Mix well to ensure the apples are evenly coated with the spices and sugar. This mixture will create a flavorful and aromatic filling for your biscuits.
Step 3: Flatten Biscuits: Open the can of refrigerated biscuit dough. On a lightly floured surface, flatten each biscuit into a circle approximately 4 inches in diameter. You can use a rolling pin or simply press them out with your fingers. The goal is to create a thin, even surface to hold the apple filling.
Step 4: Fill and Seal: Place a spoonful of the apple mixture in the center of each flattened biscuit. Gently fold the edges of the biscuit up around the filling and pinch them together to seal. Ensure the filling is completely enclosed to prevent it from leaking during baking.
Step 5: Arrange and Brush: Arrange the filled biscuits on the prepared baking sheet, seam-side down. Brush the tops of the biscuits with the melted butter. This will help them turn golden brown and create a deliciously crisp exterior.
Step 6: Bake: Bake the biscuits in the preheated oven for 15–18 minutes, or until they are golden brown. Keep a close eye on them to prevent burning.
Step 7: Prepare Glaze: While the biscuits are baking, prepare the glaze. In a small bowl, whisk together the powdered sugar, 1–2 tablespoons of milk, and ½ teaspoon of vanilla extract until smooth. Add more milk, one teaspoon at a time, until you reach your desired consistency.
Step 8: Cool and Glaze: Once the biscuits are baked, remove them from the oven and let them cool slightly on the baking sheet. Then, drizzle the glaze evenly over the warm biscuits.
Step 9: Serve: Serve the Apple Pie Biscuits warm and enjoy!
Why You’ll Love This Recipe
These Apple Pie Biscuits are loved for their simplicity, delicious flavor, and comforting warmth. They are incredibly easy to make, requiring minimal ingredients and preparation time. The combination of flaky biscuits, sweet apple filling, and smooth vanilla glaze is simply irresistible. It’s a perfect treat for any occasion and a great way to satisfy your sweet tooth without spending hours in the kitchen.
Serving Suggestions:
- Serve warm with a scoop of vanilla ice cream or a dollop of whipped cream.
- Enjoy as a sweet side dish with breakfast or brunch.
- Pair with a hot cup of coffee or tea for a cozy afternoon treat.
- Serve as a dessert after a light meal.
- Offer as a homemade gift during the holidays.
Tips:
- Make sure to finely chop the apple pie filling to ensure it fits easily into the biscuits and bakes evenly.
- Don’t overfill the biscuits, as the filling may leak out during baking.
- If you don’t have apple pie filling on hand, you can use fresh apples sautéed with cinnamon and sugar.
- For a richer flavor, use brown butter instead of melted butter for brushing the biscuits.
- Store leftover biscuits in an airtight container at room temperature for up to 2 days. Reheat before serving for the best taste.
- Add a pinch of nutmeg or cardamom to the apple filling for a warmer, more complex flavor.
- For a vegan version, use plant-based biscuit dough, vegan butter, and non-dairy milk for the glaze.
- To prevent the bottoms from burning, place a double layer of baking sheets in the oven.
Preparation Time:
15 minutes
Cook Time:
15-18 minutes
Total Time:
30-33 minutes
Nutrition Information:
(Note: Nutritional information is approximate and can vary based on specific ingredients and brands used.)
Calories: Approximately 250-300 per biscuit Protein: 3-4 grams Sodium: 300-400 milligrams
Conclusion
These Apple Pie Biscuits are a delightful and easy-to-make treat that combines the best of biscuits and apple pie. They’re perfect for a quick dessert, a sweet breakfast, or a cozy snack. With just a few simple ingredients and steps, you can create a warm, comforting, and delicious treat that everyone will love. Enjoy the flaky, apple-cinnamon goodness and the sweet vanilla glaze. Happy baking!
5 Questions and Answers about this recipe:
Q1: Can I use a different type of filling? A: Absolutely! While this recipe calls for apple pie filling, you can easily substitute it with other fruit fillings like cherry, blueberry, or peach. You can also get creative and use fillings like Nutella or even a savory cheese and herb mixture.
Q2: What if I don’t have refrigerated biscuit dough? A: If you don’t have refrigerated biscuit dough, you can use homemade biscuit dough or even crescent roll dough. Keep in mind that the baking time may vary depending on the type of dough you use, so keep a close eye on them while they’re in the oven.
Q3: Can I make these biscuits ahead of time? A: Yes, you can prepare the apple filling and flatten the biscuits ahead of time. Store them separately in the refrigerator until you’re ready to assemble and bake. It’s best to bake them fresh for the best texture.
Q4: How do I prevent the filling from leaking out? A: To prevent the filling from leaking out, make sure to finely chop the apple pie filling and don’t overfill the biscuits. Pinch the edges of the dough together tightly to seal. Placing the biscuits seam-side down on the baking sheet can also help.
Q5: Can I freeze these biscuits? A: Yes, you can freeze these biscuits after they’ve been baked and cooled. Wrap them individually in plastic wrap and then place them in a freezer-safe bag or container. They can be stored in the freezer for up to 2-3 months. Reheat them in the oven or microwave before serving.